Tattoo Placement Simulator — Compare Spots Before You Ink
A tattoo placement simulator puts your design on a photo of an actual body spot so you can judge size, flow and visibility before anything is permanent. But the search means two different jobs: you either have a spot and want to test the design, or you have no spot yet and need to compare several. This page does both — the free tool below runs the first job, and the eight-spot table underneath, with pain ranges and sightlines pulled from our own per-spot guides, runs the second.
Drop your photo here
Drag and drop or click to upload. JPG, PNG, HEIC up to 10MB.
Avoid including your face for privacy.
AI-generated reference. Consult a professional tattoo artist before inking. AI previews are approximations. Actual results depend on your artist's technique, ink, skin type, and placement.
One Word, Two Jobs: Test-a-Spot vs Choose-a-Spot
Search autocomplete splits “tattoo placement” straight down the middle: “chart” and “pain chart” on one side (people comparing spots they have not picked), “on arm” and “ideas” on the other (people who have picked and are testing). Almost every tool answers only the second job — the table below is built for the first.
Job 1 — You already have a spot
Upload a photo of that spot, place the design, scale to centimetres, blend opacity. The question at stake is fit: size against your limb, flow along the muscle, collisions with existing ink.
The tool above does this. Full workflow and blending notes live on the tattoo simulator; what a preview can and cannot settle is on the tattoo preview page.
Job 2 — You have no spot yet
Before placing anything you are comparing columns: pain range, visibility at work, friction from clothes, canvas size, how the area ages. A simulator is useless here — the eight-spot table below is the right tool for this job.
Best combined move: shortlist with the table, photograph your two finalists, and run the same design on both in the tool above. Most regret lives in this step people skip.
The Eight-Spot Placement Chart That Actually Decides Things
Pain ranges are the self-reported numbers our own per-spot guides collect (0 = painless, 10 = worst). Every row links to the full guide. This is the “placement chart” search deserves: decision columns, not anatomy labels.
| Spot | Pain (self-reported) | Visibility | Canvas & distortion | Full guide |
|---|---|---|---|---|
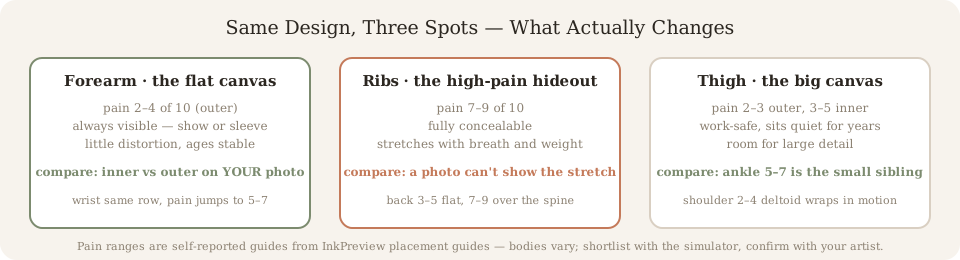
| Outer forearm | 2–4 / 10 | Always on show | Flattest canvas; ages with least distortion | Forearm guide |
| Upper arm | 2–4 outer, 3–5 inner | Easy to cover | Curved wrap; classic first-tattoo zone | Upper-arm guide |
| Shoulder | 2–4 deltoid, 3–5 blade | Cover or bare, your call | Round surface; reads differently across motion | Shoulder guide |
| Thigh | 2–3 outer, 3–5 inner | Work-safe | Big quiet canvas; stretch risk only with sharp weight change | Thigh guide |
| Back | 3–5 flat, 7–9 on spine | Fully concealable | Largest single canvas; symmetry matters | Back guide |
| Wrist | 5–7 inner, 4–6 outer | High visibility; watch friction | Small canvas; fine detail fades fastest here | Wrist guide |
| Ankle | 5–7, sharper over malleolus | Socks decide | Thin skin on bone; shoe edges rub fresh ink | Ankle guide |
| Ribs | 7–9 — the top of most charts | Hideable | Moves with breath; a still photo cannot show the stretch | Ribs guide |
Bodies vary; these ranges are guides, not promises. Longer sessions make any column worse.
What a Placement Simulator Cannot Show You (Honest Limits)
Model photos are not your canvas. Every placement tool on the first page of results shows body models, because models photograph well. Your limb circumference, taper and existing ink are different geometry. The only placement check worth trusting is on your own photo — which is exactly the upload the tool above asks for.
A still photo freezes a moving object. Ribs stretch when you breathe, thigh reads differently sitting than standing, shoulder wraps change when your arm swings. Flat previews cannot show that; for full-wrap angles, an AR app or a mirror in the studio remains the honest answer (the preview page splits those options).
Placement decisions age in two directions. Sun-exposed spots fade faster, high-friction spots rub, and high-visibility spots get judged by people who saw them in meetings. No simulator predicts any of that; the per-spot guides linked in the table each cover their own healing and fade notes.
Use the simulator to shortlist, then let the artist’s stencil fitting settle the final millimetres — that is what it is for.
Placement Questions People Actually Type
Which tattoo placement hurts the most?
On the self-reported ranges our placement guides collect, ribs top the list at 7–9 out of 10 — thin skin over bone with almost no cushioning. The spine line on a back piece rates similarly (7–9) while flat back areas sit at 3–5, and the inner wrist over the pulse point runs 5–7. “Hurts most” also depends on session length: a 20-minute rib piece is manageable in a way a 4-hour one is not.
Which tattoo placement hurts the least?
Fleshy, low-movement areas: the outer thigh (2–3 out of 10), the deltoid shoulder and outer upper arm (2–4), and the outer forearm (2–4). These are the same spots artists recommend for first tattoos — not because they are numb, but because short sessions there stay comfortable and heal quietly.
How to choose a tattoo placement?
Filter in four passes, in this order: concealability (job and family), visibility to yourself (some people regret ink they never see), friction (waistbands, watch straps, shoe edges, desk edges), and canvas shape (flat panels like the forearm distort less than curved wraps like the calf). Then run the shortlist through a photo test: same design, your arm and your ribs — the table above links every spot’s full guide.
What is the least painful place to get a tattoo?
The same answer as “hurts least” above, but worth asking separately because pain is only one column of the decision. A near-painless spot you see daily and that rubs against a seatbelt every week tends to age worse in satisfaction than a 4/10 spot with better sightlines. Compare pain, visibility and friction together — that is what the eight linked guides in the table each detail.
Can't decide on tattoo placement — what should I do first?
Stop comparing model photos; start comparing your own. Photograph two or three candidate spots once, then place the same design at real centimetre size on each. Size perception shifts body-to-body: a 10 cm piece that looked modest on your forearm can dominate your wrist. One upload round-trip per spot, free in the tool above, settles more than a week of browsing.
What is a tattoo placement chart?
A body map listing candidate spots — usually with pain ratings, visibility and size limits. Two flavours exist: naming charts (anatomy labels) and pain charts (shaded bodies by discomfort). The table on this page is the useful kind: it is filterable by decision column and every row links to a full per-spot guide with sizing notes.
Two finalists? Put them both on your skin
One photo per spot, same design, real centimetre size. Free, no sign-up required.
Open the Simulator